This blog post is really a prequel to two posts I wrote earlier this year: How to do a CRM Demo and a Sample CRM Demo Script. On this occasion I am going to focus on building the base environment and infrastructure for the demo. I would like to thank my colleague Simon Hutson who helped me set up my first laptop and demo environment when I joined Microsoft, and it is his recommended configuration that you will find below.
![]()
For those of you who follow Microsoft news closely you may remember that at last years MGX (an internal Microsoft meeting with something like 40,000 employees) Steve Ballmer announced a Surface for all FTE’s and a PC refresh. Last week was my turn to benefit from the Microsoft PC refresh program. As soon as I handed in my old PC and took possession of my new one I needed to reconfigure my laptop. So here is what I have configured to enable me to have a fully functioning CRM 2011 environment using Microsoft Hyper-V. My demo environment works offline as well as online and I can get internet connectivity to my virtual image even if I am only connected via Wi-Fi.
After this set up you should be able to:
- Run a CRM Demo Virtual Machine with and without internet connectivity
- Run Outlook with the CRM client when you are connected or disconnected to the internet
- Connect to the CRM Demo Virtual Machine via a fixed IP address
This post assumes that you already have a virtual machine with CRM Installed. If you don’t there are plenty of artciles out there that cover a CRM installation. The focus of this article is the laptop setup and Hyper-V configuration.
My laptop is a whopping 3kg+ and consists of:
- HP EliteBook 8670w Intel Core i7
- 32 GB RAM
- Windows 8 Profession 64 Bit
- 2 SSD Drives (I replaced the CD drive with an SSD and caddy giving me a total of 2 SSD Drives)
This is a far cry from the days that I used to demo CRM 3 (anyone remember Danube? If so leave a comment) with only 4GB ram and Virtual PC! CRM runs extremely fast on the above spec but you still need to have the base configuration set up properly if you want to avoid problems.
In Summary the steps are:
- Enable Microsoft Hyper V
- Create three Virtual Switches (External Ethernet, External Wi-Fi, Internal)
- Configure Internal Adapter
- Create or Import a Virtual Machine
- Create and Configure Virtual adapters
- Optional – Configure DNS on the CRM Demo Virtual Machine
Step By Step Instructions
- Enable Hyper V
- a. Go Control Panel > Programs & Features > Turn Windows features on or off
- b. Select Hyper-V as per the screenshot below
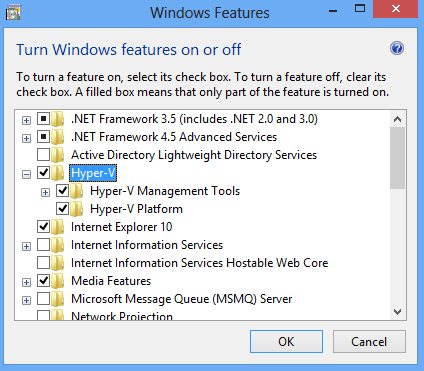
This will probably require a reboot. Please note that if the option to select Hyper-V is greyed out you may need to ensure you have the following enabled in the BIOS:
- Hyper Threading
- Virtualization Tech and VT-d are enabled
- Security Chip or TPM is enabled
Note that the naming of the above options may differ depending on the BIOS you are running.
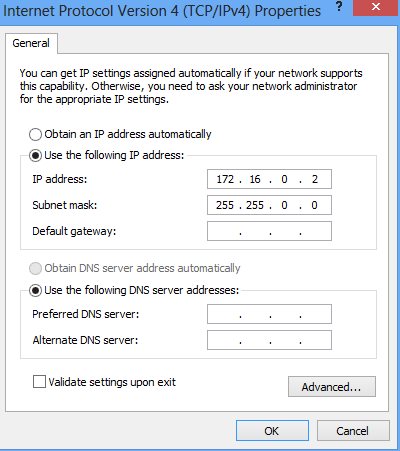
The following settings will give me a fixed IP for my Host PC (Physical) of 172.16.0.2 and a fixed IP for my Guest PC (virtual Demo) of 172.16.0.1
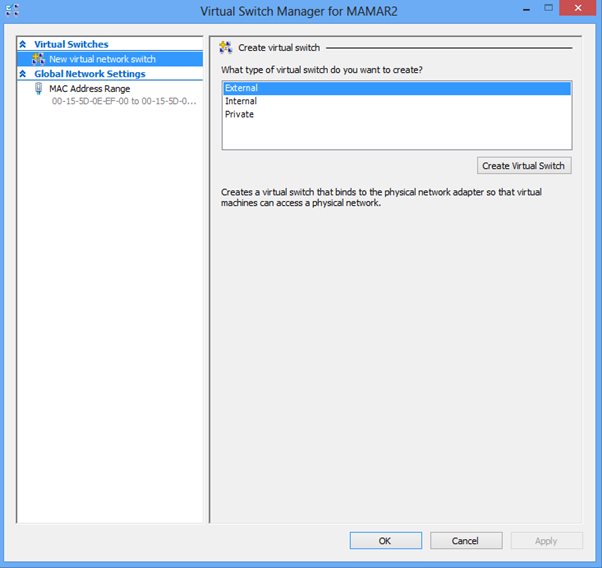
2. Create three Virtual Switches from the Virtual Switch Manager
a. Start Hyper- V Manager > Virtual Switch Manager > Create Virtual Switch
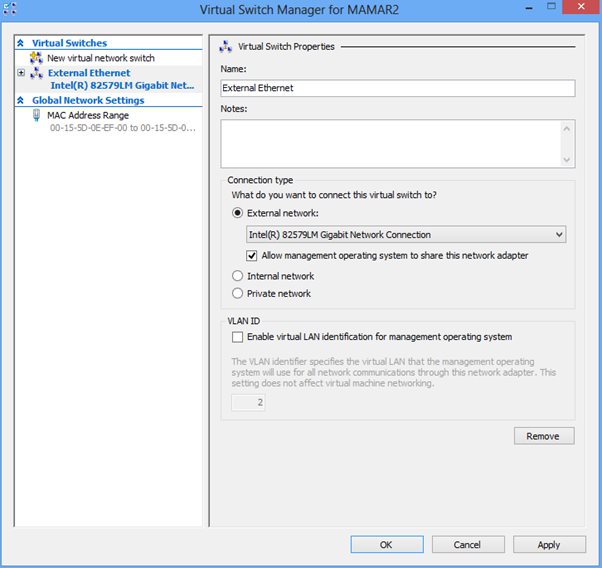
b. Create an the first Virtual Switch: External Virtual Switch (External Ethernet)
c. Name it External Ethernet
d. See screenshots below, take care to ensure that you select the right option under External Network dropdown. In my case this is the Intel 82579LN Gigabit Network Connection
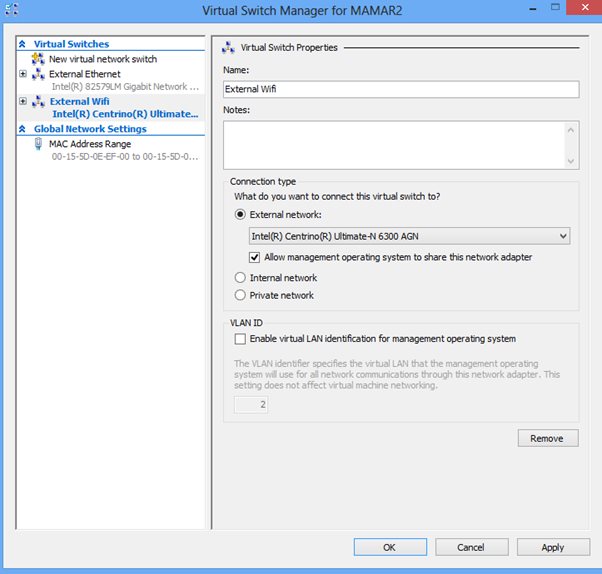
e. Create an the second Virtual Switch: External Virtual Switch (External Wi-Fi)
f. Name it External Wi-Fi
g. See screenshots below, take care to ensure that you select the right option under External Network dropdown. In my case this is the Intel Centrino Ultimate-N 6300 AGN

h. Create an the third Virtual Switch: Internal Virtual Switch (Internal)
i. Name it Internal
j. See screenshots below, select Internal Network.

That should give you something like this (Open Network and Sharing Center > Change Adapter Settings):
3. Configure the vEthernet (Internal) adapter (right click > properties.
a. Change the IPv6 setting to the following

b. Change the IPv4 settings to the following
4. Leave default settings for vEthenet External Wi-Fi & External Ethernet Ethernet)
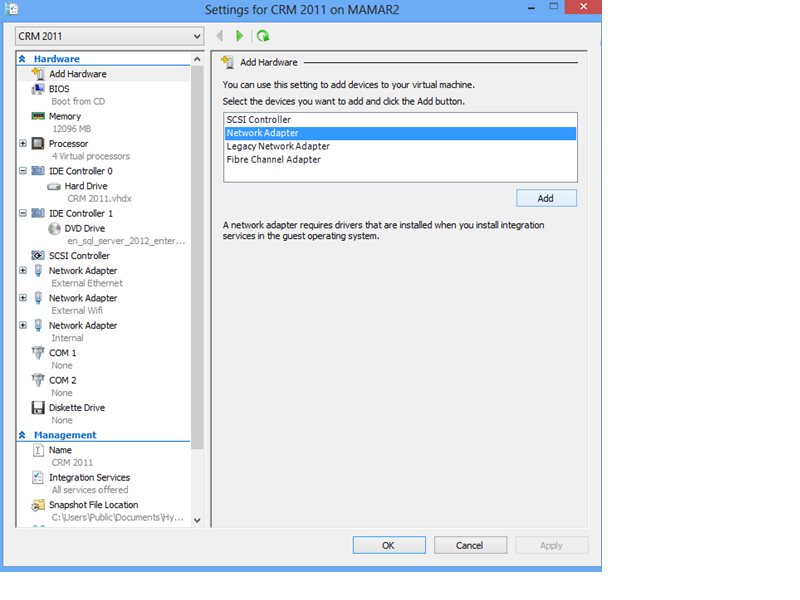
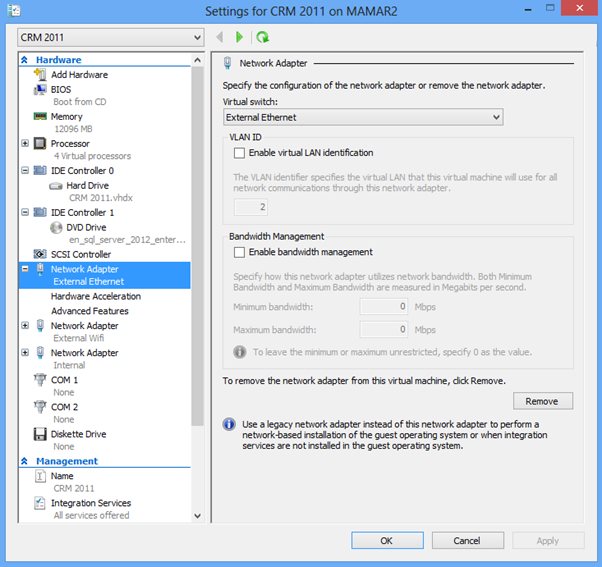
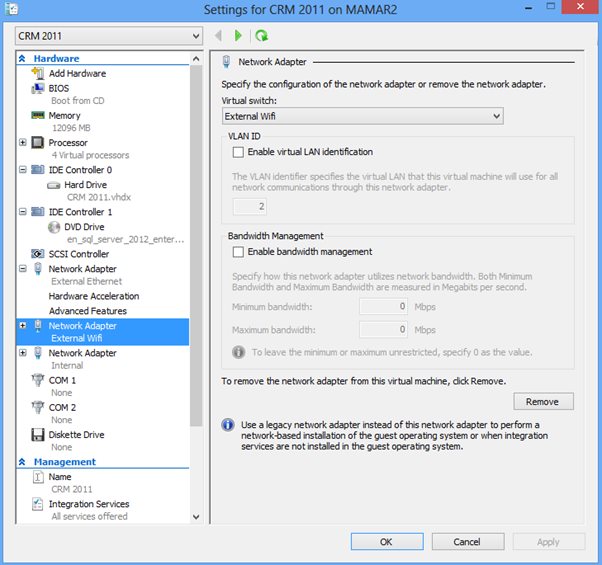
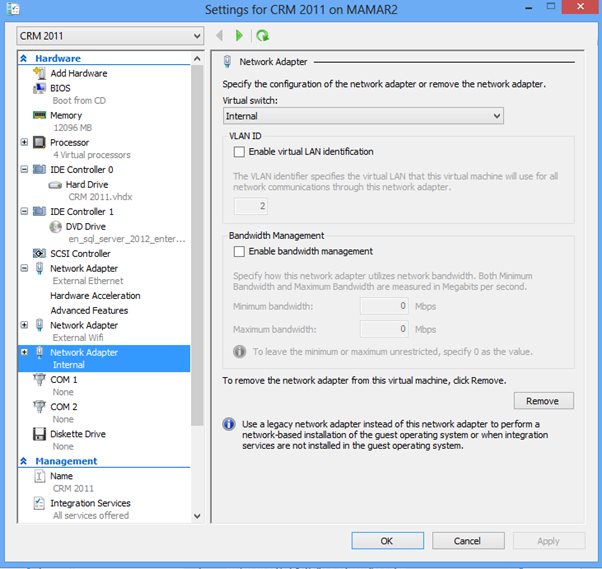
5. Go to the Settings of the virtual machine and add three network adapters
 External Ethernet:
 External Wifi
 Internal:
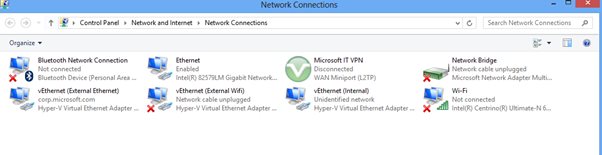
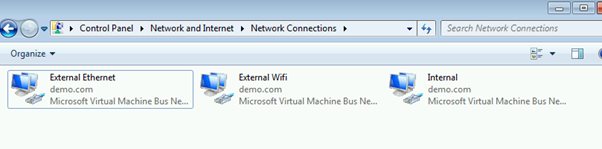
6. Start the virtual machine and go to Control Panel > Network and Internet > Network Connections and you should have the following:
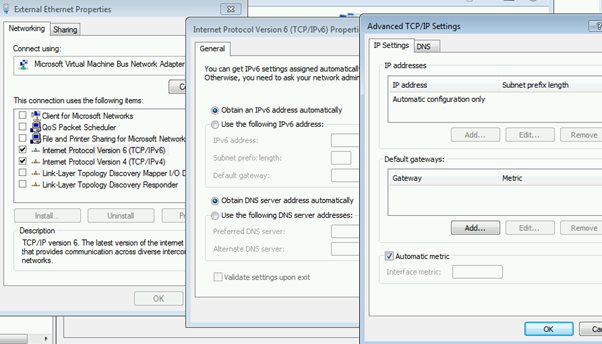
7. Mr virtual machine is also a DNS server so for External Ethernet and External Wi-Fi uncheck all items except for IPv6 and IPv4. I left the IPv4 and IPv4 setting as default as per the screenshot below.
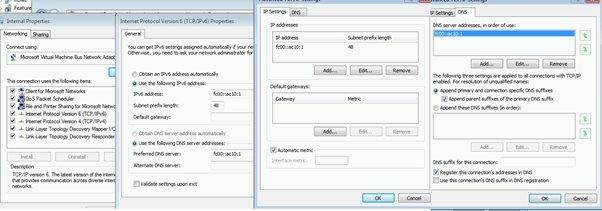
8. Modify the Internal Adapter IPv6 setting as follows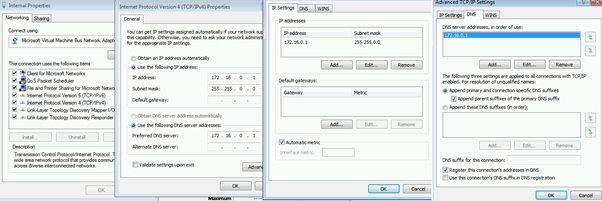
9. Modify the Internal Adapter IPv4 setting as followings as follows
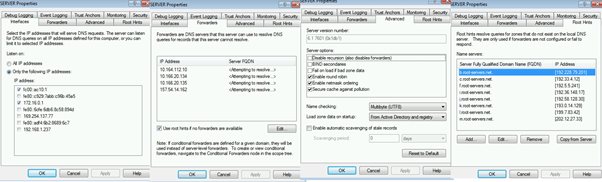
10. If you are interested in my DNS settings that I have on my CRM Demo Virtual Machine they are as follows:
That is it you are done. With this set up you should be able do a demo from your Hyper-V virtual Demo machine and get access via Wi-Fi when you are connected
This posting is provided “AS IS” with no warranties, and confers no rights.
Next on Mark Margolis’s Blog: CRM and User Adoption

Hi Mark, thanks for the detailed instructions on how to configure Hyper-V switches. I never made the switch from VirtualBox to Hyper-V because I never had any issues with VirtualBox and it doesn’t require any expertise in IP address management or switch configuration. So why use Hyper V when VirtualBox is easier?
I Neil,
I’ve never used VirtualBox so afraid I can’t comment. Never had any problems with Hyper-V so have never looked at anything else. I’ll ask around though…
I meant to add that the only reason I chose to fix the IP is for convenience when I’m on the MSFT network and for mapping drives….